
Fixing and Looking After Karaoke Machines
Maintaining a pro karaoke set-up needs a step-by-step plan to keep it working well and lasting long. Taking care of it the right way stops common problems, keeps the sound great, and makes sure the gear stays reliable.
Key Care Routine
Monthly Mic Care:
- Clean mic fronts with high-quality cleaning fluid
- Test and set audio levels
- Look for noise issues or odd sounds
How to Store and Control Conditions
Keep tight control over the setting:
- Temperature range: 45-75°F (7-24°C)
- Humidity: Under 65%
- Put mics upright in their holders
- Keep gear out of direct sun
System Tech Checks
Do System Tests Every Three Months:
- Make sure power levels are steady
- Test speaker sound levels
- Make sure the display signals work well
- Check all cable hooks
- Get the latest software if you can
Care Steps to Avoid Damage
Keep an Eye on Gear:
- Watch how the system is doing
- Write down care actions
- Have extra parts ready:
- Extra fuses
- Extra sound cables
- Backup power sources
- Often calibrate sound
Usual Sound Problems and How to Fix Them
Usual Sound Problems and Fixes for Karaoke Gear
Kinds of Sound Trouble
Sound problems in karaoke machines often show up as weird sounds, low sound, or no sound at all. Using a good plan to find and fix issues can solve these common problems fast.
Basic Cable Fixing
Cable hook-ups need quick checks when sound problems show up. Weird noise and broken sounds often come from loose or dirty hook-ups. Clean audio plugs well and make sure all cables are tight for the best signal.
Issues with Sound Quality
Handling Weird Sounds
Weird sound issues come up when mixer settings aren’t right. Adjust input sound levels carefully for clearer sound. Watch the strength of the signal to avoid overloading the system.
Making the Volume Better
Fix low sound issues by checking:
- Main sound settings
- Each channel’s levels
- Speaker sound settings
- Amplifier sound settings
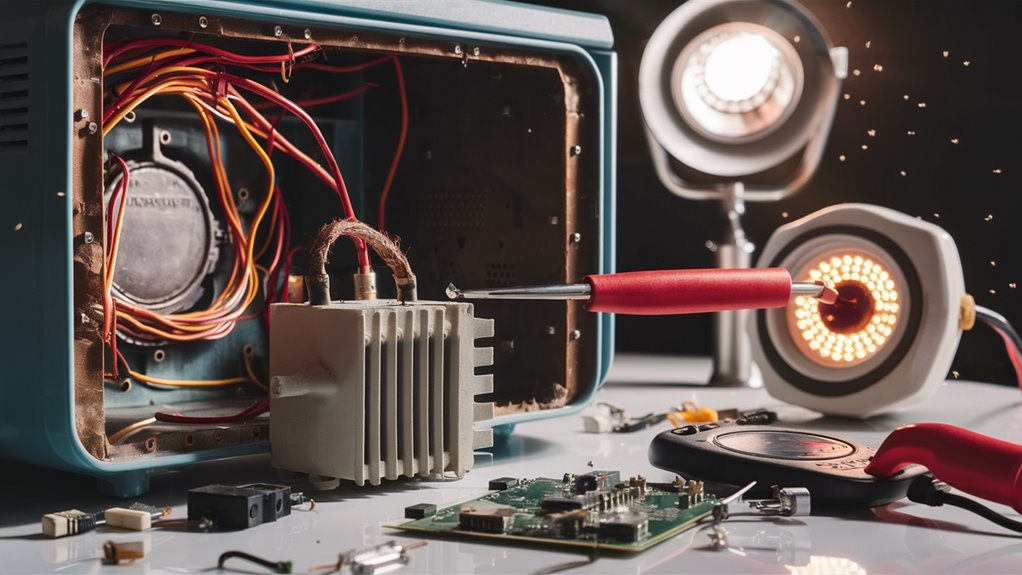
Deep Troubleshooting
When the Whole Audio System Fails
Try out mic working alone to find where the problem starts. Check and change speaker fuses if needed. Look at inside wires for signs of harm or rust.
Technical Fixes
- Check built-in amplifier parts
- Swap out broken audio IC chips
- Update software for digital units
- Test how stable the power supply is
- Watch power output levels
Mic Keeping and Tests
Mic Keeping and Testing Guide
Needed Testing Steps
Routine mic tests are key for keeping sound top-notch. Do checks each month to spot loose hook-ups, crackling noises, and signal drops. Do thorough tests by lightly hitting the mic while watching speaker output across all sound ranges.
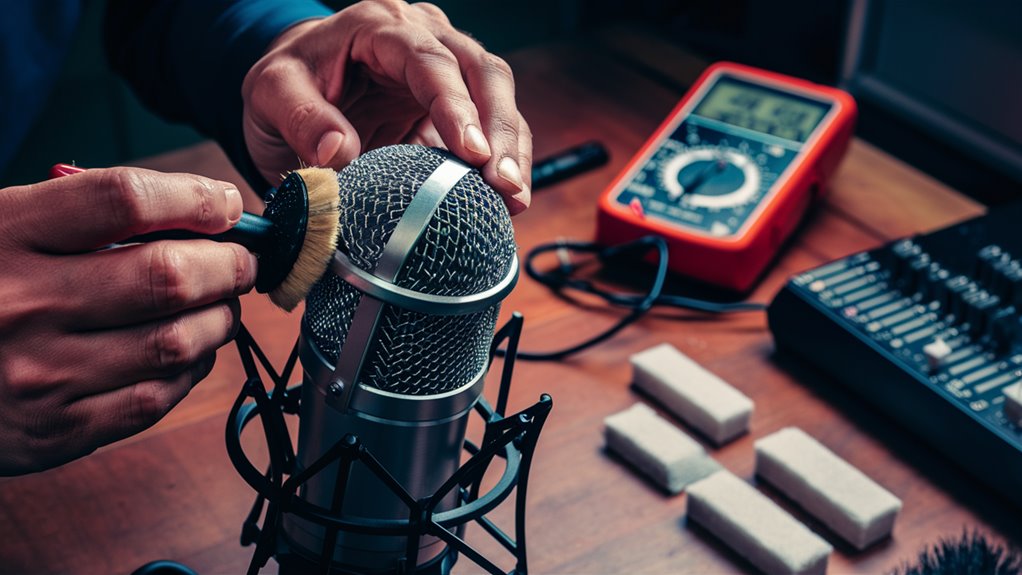
Proper Mic Care
Good mic care starts with deep cleaning the mic front using a soft brush. Use an alcohol-based cleaner for cleanliness. Look at XLR connectors and 1/4-inch jacks for rust, bent parts, and loose pieces. Check cables deeply for physical harm like twists, cuts, and exposed wires that could hurt sound quality.
Advanced Diagnostics
Deep troubleshooting needs impedance tests with a multimeter. Set the tool to measure ohms and check connector pins – dynamic mics should show between 150-600 ohms. For condenser mics, make sure +48V power is getting there. Keep them standing up in a dry spot to make them last longer and stay reliable.
Best Way to Store
- Keep mics upright to stop dampness
- Keep them dry
- Use cases when not in use
- Keep away from big heat changes
- Often check where they’re kept
Pro Testing Tools
- Multimeter for impedance tests
- Audio interface for checking signals
- Tester for mic power
- Cable testers for sure connections
- Frequency analyzer for response checks
Video Screen Fixes
Guide to Fixing Video Screens on Karaoke Machines
Start with Connections
Video issues in karaoke gear need structured fixing for the best fix. Start by checking the video output signal hook-ups between parts. Look at all connection cables to make sure they are hooked tight at both the karaoke unit and screen ends.
Setting Output and Screen Fixes
After you’re sure about the connections, focus on video output settings. Make sure the output type (HDMI, RCA, or VGA) fits your screen’s input needs. Make sure screen settings work with your screen’s abilities to stop screen mess-ups. For LCD screens with color mess-ups or screen flickers, check ribbon cables and watch power levels.
Deep Screen Troubleshooting
Text and Sync Issues
Fix onscreen text troubles by checking character settings and font files. For lyric sync issues, look at CDG or MP3+G formats. With CRT screens, check for magnet issues and get rid of any possible magnet sources.
Power and Parts Checks
Screens that blank out now and then often mean power troubles. Look at PSU capacitors and voltage parts as these often cause unstable video. Regular care of these parts makes sure the screen works right in karaoke gear.
Power and Plug Issues
Fixing Power and Plug Issues in Karaoke Gear
Checking the Power Supply
Power adapter problems are a big issue in karaoke sets. Start checks by measuring your adapter’s power output with a multimeter, compare it to what the maker says. If the power is wrong or changes, you need a new adapter fast
Sound Plug Troubles
Cable health is key for how well the system works. Look closely at sound cables for signs of harm, including:
- Clear breaks
- 베트남밤문화
- Wire showing
- Plug damage
- Stress signs on the cable
Weird sounds often come up with broken audio. Test connections by moving cables around during use to spot loose spots and bad plugs. Rusty plugs often cause sound cuts, mostly in RCA jacks and XLR connectors. Use electronic cleaner to get connections working well again.
Mic Plug Fixing
Test each mic input to find problems in certain channels or the system’s internal preamp. Important checks include:
- Mic level control settings
- choices and an inviting
- Turn on power for condenser mics
- Check input jack condition
- Make sure each channel’s preamp works
Test each port alone to find exactly where the system’s sound issues start.
Care and Keeping Gear
Caring and Storing Pro Karaoke Gear
Needed Regular Care
Regular care makes gear last longer with a good routine. Clean your karaoke system outside each month with a gentle, no-lint cloth and take dust off vents and ports with canned air. Mic care needs alcohol cleaning after each use and changing foam covers every six months.
Best Ways to Store Gear
Storing in controlled climates is vital for keeping karaoke gear safe. Keep temps between 60-75°F and humidity under 65% to avoid part damage. Put gear away from sun and damp places. Wrap sound cables with the over-under method and secure them with velcro, not rubber or twist ties.
Long-Term Gear Safety
Do system checks every three months which includes:
- Testing connections
- Checking sound output
- Looking at power cords
- Take batteries out of remotes and wireless mics
- Use silica gel packs to keep moisture away
Keep original boxes for safe moving. These steps make sure your gear works great and lasts long, helping you save on pro karaoke gear.